7.3.1. Manage Trainings
- The administrator can create classroom trainings using all the mentioned pre-requisites such as locations, aid categories, training aids, training types, action plans, manage internal trainers, manage external trainers, layouts, training rooms, training holidays, sessions and import bulk feedback.
- The trainings can be created, edited, cancelled, deleted, can view training details and manage the competency.
To access trainings:
Click
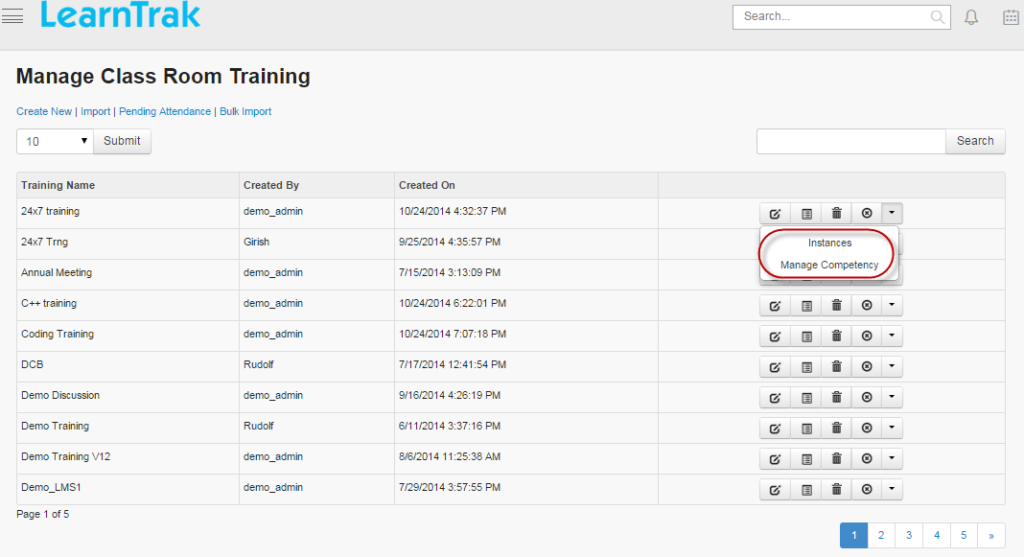
Admin > Classroom > Manage Trainings. The following Manage Classroom Training screen appears displaying a list of classroom training programs.
Steps to create the classroom trainings:
- Step 1: Create new classroom training.
- Step 2: Create new training instances.
- Step 3: Publish the newly created training instances to the respective user groups.
- Step 4: Take users attendance.
- Step 5: Give feedbacks.
- Step 6: Fill the action plan details.
7.3.1.1. Create New Training
To create training:
Click Create New. The following Create New Training appears with the required fields to be filled.
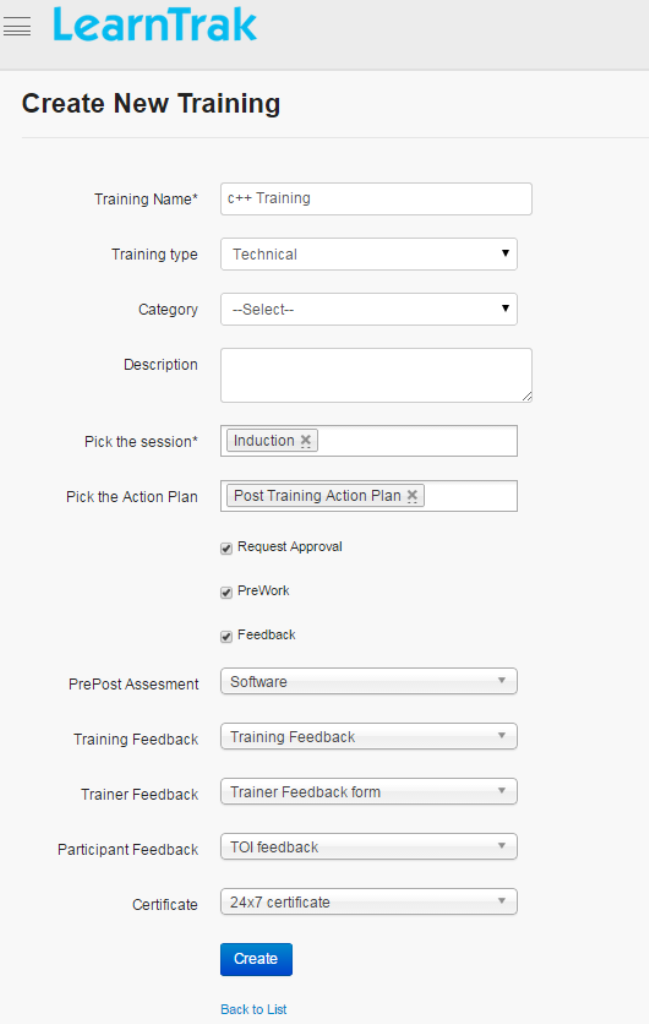
Note
- Pick the sessions and action plans: Action plans, single or multiple sessions is assigned to the training program.
- The training type, category, action plan, pre-post assessment and certificate fields are not mandatory.
- The Pre-Post assessments list 3 types of feedbacks:
o Training Feedbacko Trainer Feedbacko Participant Feedback
- Email notification is sent to the users for the pre-post assessments and feedbacks attached to the classroom training.
- The Training type lists and filters all the categories under particular training type and when not selected the categories are global.
- The pre-work, feedback and request approval is optional.
- The request approval when checked the request is private and is sent to the administrator for approval.
7.3.1.1.1. Cancel Training Nominations
- The nominated users can cancel the training nomination for a particular training program.
- The nomination can be cancelled before the set Cancel Before date or time.
- When training is cancelled, it will be listed again under Available Training tab on user’s account for future enrollments.
- If the user tries to cancel the training nomination after the expired date or time, a warning message is displayed as: “Cancel before date for this training has expired”.
- If the user needs to cancel the nominations for the request approval trainings, a request must be sent to the reporting manager for the approval or rejection.
7.3.1.1.2. Edit Training
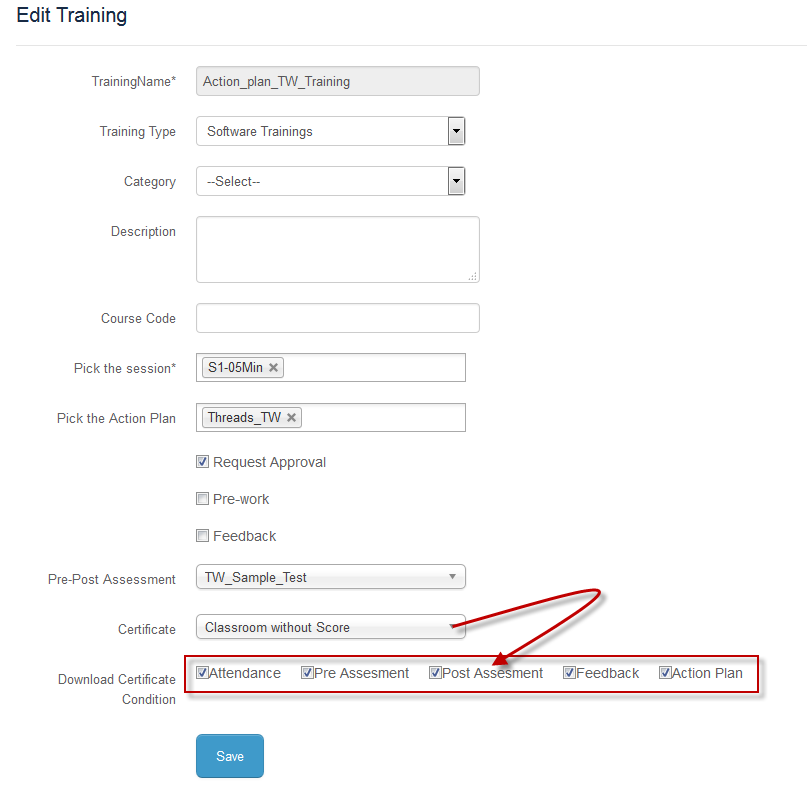
To edit training:
- Click Edit
. The Edit Training Name screen appears with the chosen fields to be edited.
- The training details can be edited, if no instance is created for that particular training.
- The training details cannot be edited when the instance starts or it displays a warning message as: ”Training cannot be edited because it has been already started”.
7.3.1.1.3. Delete Training
To delete the training:
- Click Delete
, to delete the trainings.
- Trainings can be deleted only after deleting every instance in a particular training.
- An alert box is displayed with the following message: “Do you want to delete the training Training_Name?” click Ok or Cancel.
- If trying to delete training programs with instances, a warning message is displayed: “Cannot delete! Training is in use”.
7.3.1.1.4. Cancel Training
To cancel the training:
- Click Cancel
, to cancel the trainings.
- Training can be cancelled only by cancelling all the instances in a particular training.
- A pop-up Cancel Training screen appears with the reason for cancellation of the training.
7.3.1.1.5. Pending Attendance
- The pending attendance displays, lists of all the pending users attendances to be taken by the administrator enrolled for the classroom trainings.
- Refer Pending Attendance under Trainer.
7.3.1.1.6. Single Import and Bulk Import Classroom Trainings
To import training:
- Click Import | Bulk Import to upload classroom trainings. The Import Training screen appears to upload classroom trainings via .csv file.
- The .csv file size should be less than or equal to 4MB. Refer Bulk Uploading Process under Import Bulk Users.
Note
7.3.1.2. Edit Properties
- To access:
- Click Edit Properties. The Edit Training screen appears with the chosen fields to be edited.
The training name, sessions and the feedbacks, if attached to the respective classroom trainings it cannot be edited after the training session starts and also before the training session ends.
The feedbacks, action plans or the descriptions is added after the training session is completed.
The feedbacks cannot be edited/changed, if it is already attached to the classroom trainings. It can only be edited if the trainings does not have any feedbacks.
The certificate attached to the trainings is downloaded by default after completion.
- The certificate can also be downloaded by giving conditions like:
- 1. Download certificate after taking user attendance.2. Download certificate after completing the pre-assessments.3. Download certificate after completing the post-assessments.4. Download certificate after giving the feedbacks.5. Download certificate after completing the action plans.
The administrator must check either of the download certificate condition or all the certificate conditions depending on the requirement. Based on the applied conditions the certificate is downloaded at the user-end.
7.3.1.3. Manage Pre-Work
- Manage pre-work allows administrators to upload the resources of type Documents, URL, AICC, SCORM 1.2, Experience API, Feedback and Assessments.
- The resources are published to user groups and are available in the respective user accounts.
- The users can access & play the resources and also can upload single or multiple resources.
- The resources uploaded by users are sent for approval or rejection to the reporting manager.
To access:
• Click Manage Pre-work. The following Pre-work Resources screen appears.• Click, to upload new pre-work resources.
• Click View, to download the resources.• Click Remove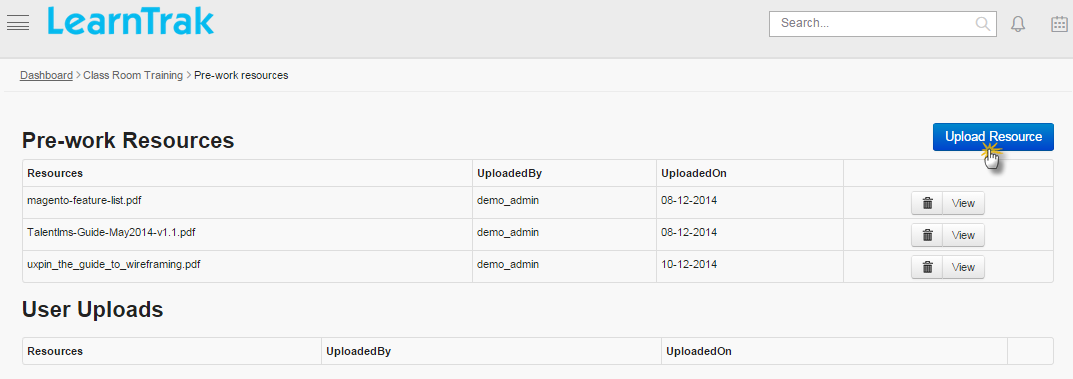
7.3.1.4. Manage Competency
- The competencies created under respective categories are mapped to the classroom trainings.
- The trainings created are assigned with competencies, that are added from Not Linked Competencies to Linked Competencies.
- On user account, all the added competencies can be accessed by the users during classroom trainings.
To access:
• Click Manage Competency. The following Manage Competency screen appears listing all the mapped competencies.• Click Add, to add the competencies.• Click Remove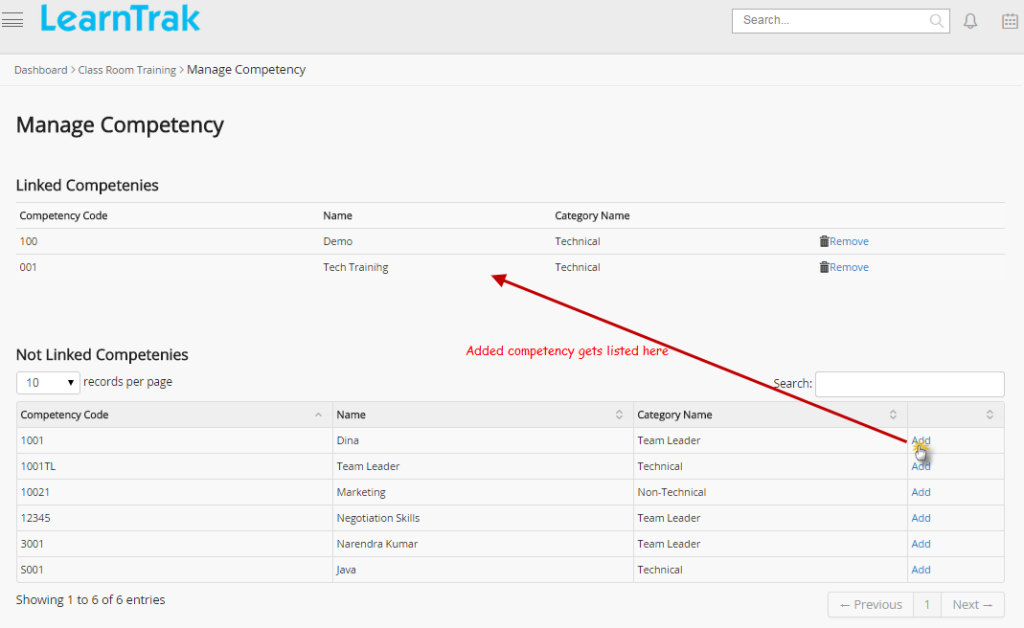
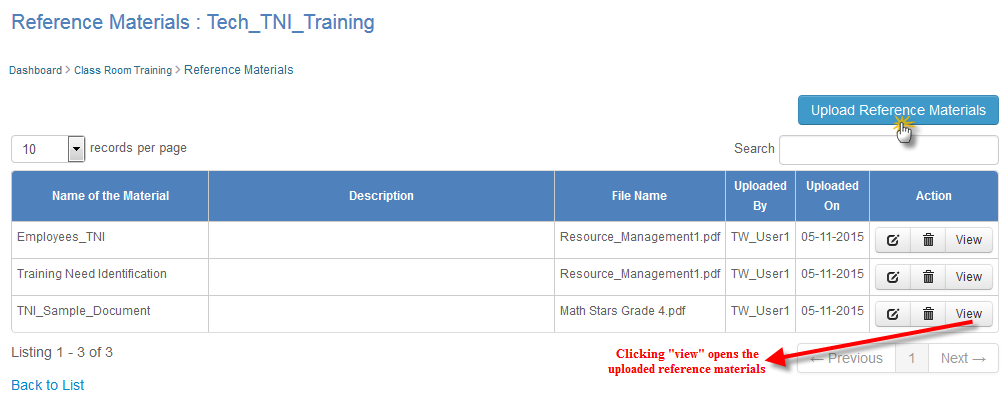
7.3.1.5. Uploading Reference Materials
- The administrator can upload the reference materials for the respective classroom trainings.
- These reference materials can be accessed by the users after administrator takes the attendance.
- The reference materials cannot be downloaded, if the user does not attend the training i.e. is absent or the administrator does not take the attendance.
To access:
• Click Reference Materials. The following Reference Materials screen appears.• Clickto upload the documents of type PPT/PDF/Word/Excel documents.
• Click View to see the uploaded document.